
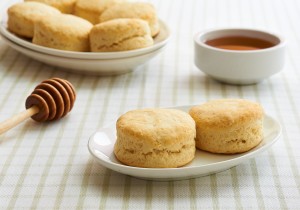
A shoot like this is all about the highlights. When photographing white reflective objects with a digital camera, maintaining tone and texture in the highlight areas is paramount.
Lighting
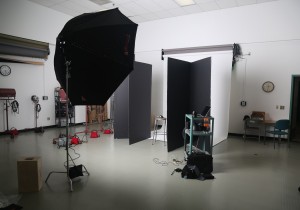
In order to cut down on the specularity of the stove top popcorn, I wanted to use the softest light possible. To create this, I used a light bounced into v-flat and back into a light panel with 400 leelux. To lower the contrast, I filled from on-axis with a 60″ softlighter.
Tone and Texture
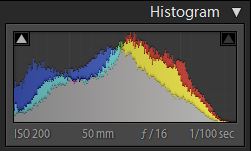 The key to maintaining tone and texture is to set the correct exposure. There are a number of ways to do this, but since I tether, I use the histogram and expose to the right. When using this method, it’s important to expose the RGB levels to approximately 244. RGB levels go up to 255, but most digital cameras tend to get some chroma smearing from 244 on up so this is a decent rule of thumb.
Considering how bright most modern food images are, if the overall image looks a little flat and underexposed at 244, it’s ok to pump up the midtone brightness in Photoshop or Lightroom to compensate.
Wrap Up
Digital imaging is an amazing process that allows you to fix almost any problem in Photoshop except one – blown highlights. With a RAW file, shadows can be pulled up, but highlights can rarely be pulled back. If you watch the histogram and expose to the right you’ll have perfectly exposed images every time.
Lighting Setup

Technical
Camera: Nikon D90
Lens: Tamron 17-50mm 2.8
Strobes: White Lightning x1600
Tripod: Manfrotto
ISO: 200
Focal Length: 50mm
Shutter: 100
Aperture: f/16




Again I’ve been drawn into your camera work that I totally have no understanding even though I’ve tried. Your simple explanations for those who are true camera buff it’s a weekly revelation from an expert. To me it’s like poetry and I can’t wait for the following Thursday so I can be confused once more.
The tip about exposing to 244 on the RGB scale is really helpful! Do you have a preferred method in Lightroom or Photoshop for fine-tuning highlights without losing detail?