The truth about me is…I’m a hot mess.
It’s true…and I’m well aware. Check out my stats:
- my gas tank is perpetually on E
- I lose my keys on the daily
- quite frequently I say “We have to go back, I left the _____.”
- my car looks like he hasn’t been washed since the ’90s
- …and I don’t even know where my phone is, right now!
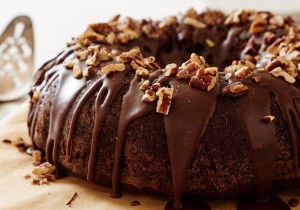
I could go on but I’ll spare you. The d-man says it’s part of my charm but most of the time, it’s just annoying. Needless to say, my hot-messiness and I are at odds. It’s a constant battle, but I claimed victory the day I made these chocolate covered potato chips. These chips say “I’ve got this!” And they were right.

Chocolate and potato chips was all I needed. Two ingredients and I had temporarily slayed the Hot Mess Beast. Head held high, I took these little beauties to a dinner party and watched my friends’ eyes alight with anticipation. They were incredibly impressed but had no idea that for some reason, my credit cards were in the trunk of my car.

I have to give it up for the d-man. I mean…the chips looked good when the chocolate cooled, but they looked nothing like this. This photography is some next-level *ish*.
Chocolate Covered Potato Chips Photo Notes
by David
“You still got that white acrylic thing?”
“Yeah.”
…and so it began.
Mondo called it, and I shot it. I did a few test shots in the baking pan, set up the white acrylic, and got conceptual with it.
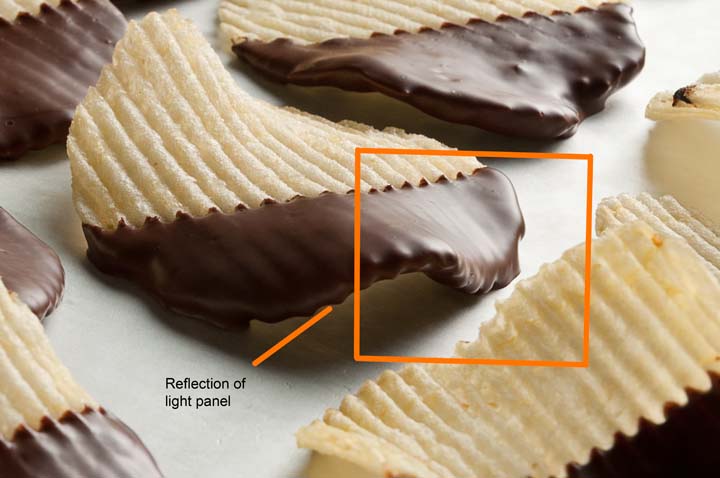
From a lighting standpoint, these things were a challenge. On a single chip, I had to light a textured and reflective surface. I wasn’t worried about the texture, but the reflective surface of the chocolate could be a problem. It would look completely flat unless I gave it shape with a bright highlight and a deep shadow.
To create this highlight and shadow, I pulled out my secret weapon: the Hacob light panel. This DIY light panel looks like junk, but it produces beautiful light with very soft transfer edges. Made by my former instructor Hacob, it’s a simple wooden picture frame filled with 400 Leelux.
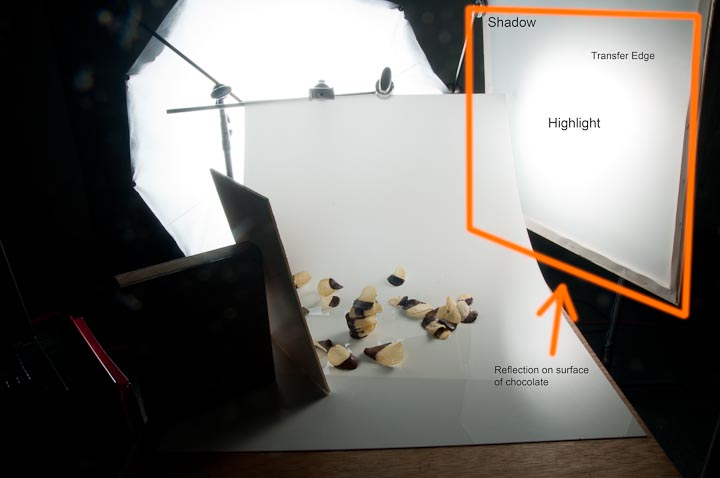
Set shot:

Ideally, this should have been shot on an infinity light table, but I did it with a piece of white acrylic propped up by a C-Stand. I placed a piece of white construction paper under the acrylic.
The lights:
1) The light in the back is adjusted one stop over my shooting aperature to create a pure white background. The modifier is a 60″ Photek Softlighter. It’s difficult to tell by the set shot, but the Softlighter is pointed upward to avoid refraction on the front lens element.
2) On the left, I have a simple white board to fill in the shadow area.
3) Lastly, on the right, I’m using the Hacob light panel to create a specular light on the side of the potato chips.
The funny thing is that after setting up the light panel to create beautiful highlights and shadows on the chocolate, I realized the back light was already doing the job. I changed gears and ended up using the light panel as an edge light.
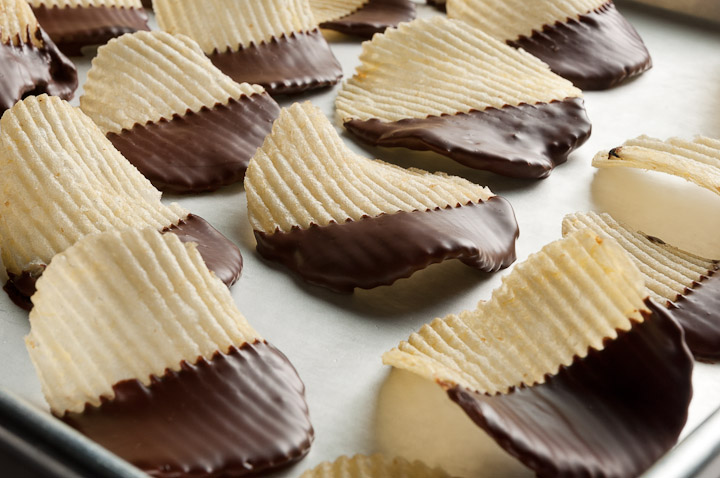
Finally, to provide a better idea of how reflective surfaces work (like chocolate), here is a technical breakdown from the first shot of this post (back light turned off):
Tech Notes:
Lighting: White Lightning X1600 monolight bounced through Leelux400 and Photek Softlighter 60″ for back-light
Camera: Nikon D90
Lens: Tamron 17-50mm 2.8
Tripod: Manfrotto with trigger grip
Aperture: f/14 – f/18
Shutter: 1/160
Focal Length: 50mm
Chocolate Covered Potato Chips Recipe
Recipe slightly adapted from Spoon Fork Bacon
- 1 cup chocolate chips (any chocolate will do. I used 60% cacao Ghirardelli)
- 1 (9.5 oz) bag ridge-cut potato chips
- Place chocolate chips in a microwave safe bowl and melt for 30sec at a time. Mine took about 90sec.
- Stir chocolate until smooth and begin dipping the chips, about ½ way.
- Shake off any excess chocolate and place chips onto a baking sheet lined with wax paper.
- Allow chocolate covered chips to dry completely before serving(about 2 hrs or you can refrigerate to speed up the process)
- Store in an airtight container for up to 1 week


I’ve never seen a website like this, it’s sensational, humorous, and the baking section that’s causing me to still salivate is explained in such an informative, funny, and simple down to earth way. Even though I know absolutely nothing about photography, I found the demonstration how the shots were taken done in the most interesting manner, with such clarity, simplicity and knowledge. I found myself reading to the end even though I didn’t understand a thing I was reading. I can’t wait what’s on the menu next time. I’m looking forward to the baker’s written words where I can salivate and at the same time be confused by the photographer’s written explanations, that I’ll read to the final word. At least the beautifully taken pictures will be a feast to my eyes.
a good mix of chocolate and snack
I’m really thankful for the way you explained Chocolate Covered Potato Chips & the Truth About Me because it felt relatable, genuine, and filled with simple joy that reminds us how small things can bring comfort. Your writing has a calming effect and truly connects with readers. Read this article for more engaging experiences. 1v1.lol unblocked offers quick online matches you can enjoy directly in your browser.
Love the detailed lighting setup
The pace of Escape Road 3 is very fast and relentless, while Trees Hate You is slower but just as tense.
Granny is a survival horror game where players must find a way to escape the house of a terrifying old woman
Drive Mad captures the thrill of overcoming impossible odds. With clever level design and physics-based gameplay, Drive Mad makes every successful finish feel earned, rewarding players who stay calm, focused, and determined under pressure.
a good mix of chocolate and snack
my car looks like he hasn’t been washed since the ’90s