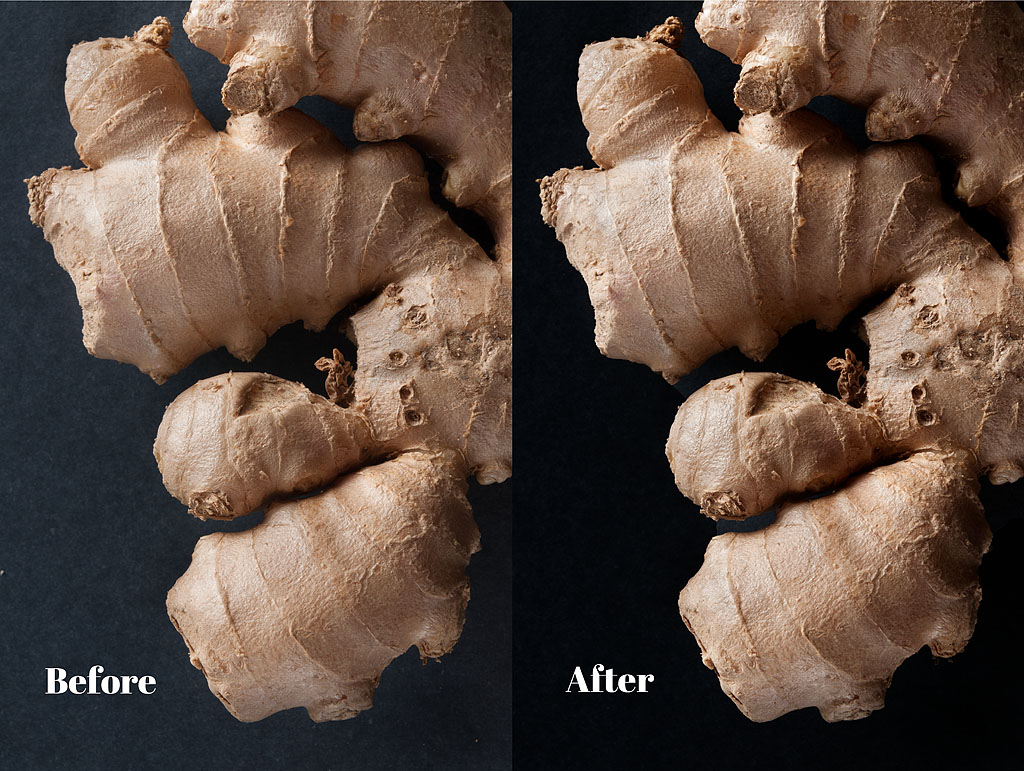
As a photo lab tech at the local community college, I see a lot of film images every week. Many of them start off rough, but I’m always amazed by how much they can be improved in the darkroom. With a little contrast and some dodging and burning, the difference is usually night and day.
In the age of digital, most images go straight to the web, but a lot of them could use the same TLC. Film may be dead, but the old techniques of dodging and burning still work.
In Photoshop, this arduous analog process is made easy. There are many techniques, but I prefer to dodge and burn with curves because the process is easily modified after the fact.
How to Dodge and Burn with Curves
Step One
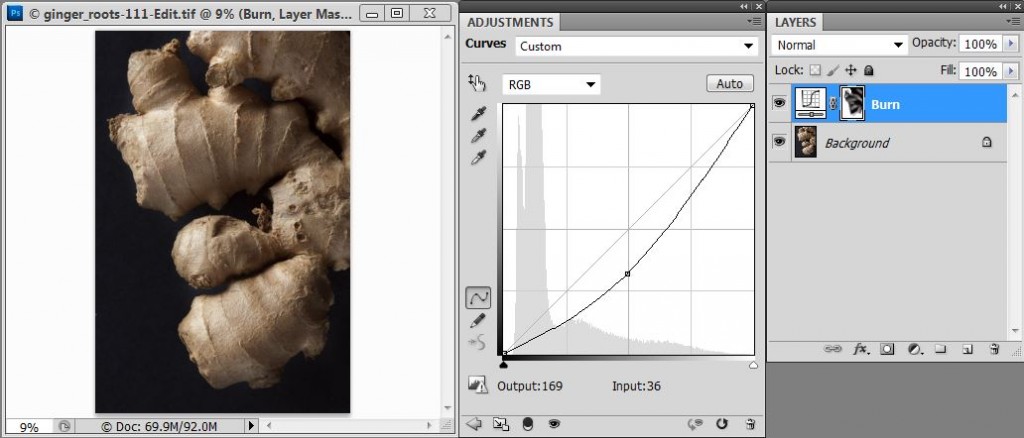
Create a curves adjustment layer
Menu ->Layers -> New Adjustment Layer -> Curves
Name the layer “Burn”
Lower exposure by pulling down center of curve
Step Two
Select curves layer mask and invert it (it should be black)
Crtl I – Win
Cmd I – Mac
Step Three
Select a brush and set to o% hardness and 7% opacity
Brush color should be white
Select the Curves layer mask and set layer blendmode to luminosity
Slowly brush areas that need to be darkened
Step Four
Create a curves adjustment layer
Menu ->Layers -> New Adjustment Layer -> Curves
Name the layer “Dodge”
Increase exposure by lifting center of curve
Step Five
Select curves layer mask and invert it (it should be black)
Crtl I – Win
Cmd I – Mac
Step Six
Select a brush and set to o% hardness and 7% opacity
Brush color should be white
Select the Curves layer mask and set layer blendmode to luminosity
Slowly brush areas that need to be lightened

Final Steps
If the work is complete and you need to make changes, just paint back the mask or adjust the curve. It’s that simple. If you want to do more, just add another curves layer and make some more adjustments. By working on a curve layer, flexibility is built in and changes be made down the road.
 The Panasonic GH4 is a game-changer. This is a camera that can shoot

