French Toast Sausages & One New Year’s Resolution

Want to upgrade your boyfriend's breakfast in bed? Bring him French Toast Sausages dusted with powdered sugar | ibakeheshoots.comOh my goodness! The new year is here! Are you ready for it? I’m not sure if I am, but that is of no consequence. It’s here, so I better get it together.

Around this time everybody starts making resolutions for themselves and their families. I get it. You want to better yourself and your situation. Usually, I promise myself the same things: lose weight, better hair care(gotta keep my ‘fro tight), get myself organized, blah, blah, blah.

Things have changed this time around. This past year I’ve embarked upon an adventure called I bake he shoots and I couldn’t be more excited. It’s been a long time since I’ve felt the level of enthusiasm that I feel for the work that Dave and I have begun.

So this year…I’m making one New Year’s Resolution:

To fully commit myself to this project, this joint adventure, this endeavor. This year will be dedicated to great food + great photography.

…and better hair care. Seriously, I never kid about my ‘fro.

Alright…enough about ‘fros and revolutions resolutions. Let’s talk food. More importantly, breakfast.

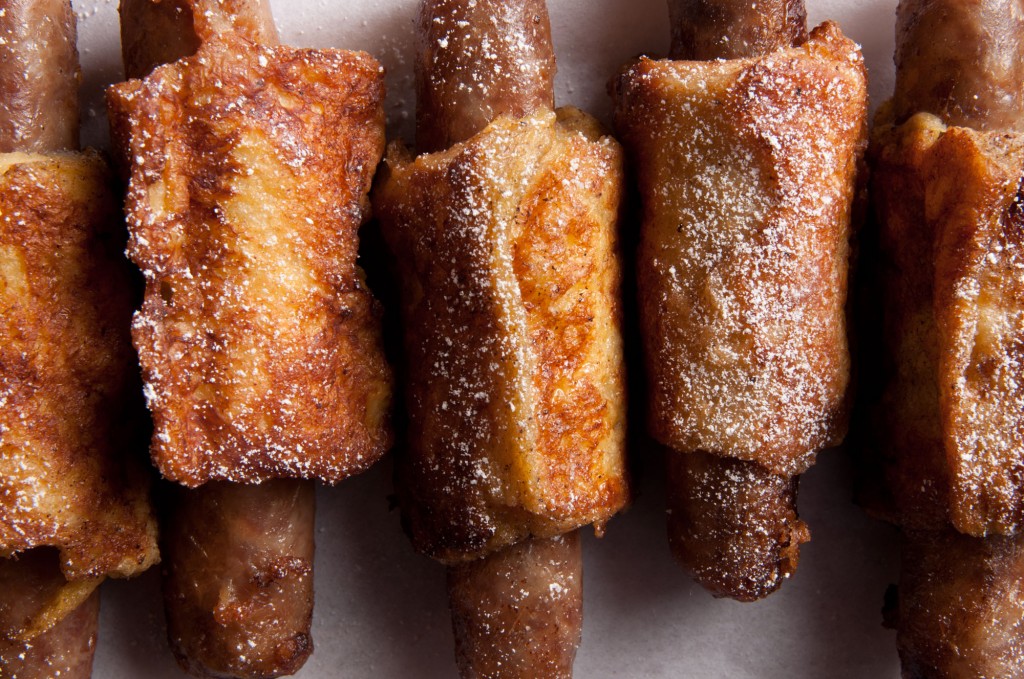
The latest issue of Food Network Magazine has a beautiful cover of Christmas cookies, but inside you’ll find a nice spread dedicated to pigs in a blanket. But not any old pigs in a blanket…french toast sausages. What?

Want to upgrade your boyfriend's breakfast in bed? Bring him French Toast Sausages dusted with powdered sugar| ibakeheshoots.com

Normally, I’m not really into french toast. I’m a waffle girl. On occasion, I’m a buttermilk-pancakes-with-a-side-of-bacon girl, but when I saw those sausages wrapped up in french toast? I was a changed girl.

Now, I’m not gonna lie to you. These babies take a little bit of work. This isn’t a everyday recipe. I’d file this under special occasions, like the Breakfast in Bed category. Or, the Mother’s Day Brunch category. Or, the I’m-sorry-I-didn’t-pick-you-up-from-the-hospital category. Well, you might need to dig a little deeper for that one.

Want to upgrade your boyfriend's breakfast in bed? Bring him French Toast Sausages dusted with powdered sugar | ibakeheshoots.com

French Toast Sausages Recipe

Recipe adapted from Food Network Magazine

French Toast Sausages and One New Year's Resolution
 
Prep time
Cook time
Total time
 
Makes 14 french toast sausages
Author:
Serves: 4
Ingredients
  • 14 breakfast sausages links, about 14 ounces
  • 2 eggs
  • ¼ cup milk(I used vanilla almond milk)
  • 1 heaping T granulated sugar
  • ¼ t cinnamon
  • pinch of nutmeg
  • pinch of kosher salt
  • 7 slices of white sandwich bread
  • 4 T butter, divided
  • Maple syrup, for dipping
  • Powdered sugar, for dusting
Instructions
  1. Preheat the oven to 375 degrees F and line a baking sheet with foil.
  2. Arrange sausages on sheet and spray with Pam or oil.
  3. Bake for 10 min.
  4. If sausages aren't brown, broil for an additional 4-5 minutes.
  5. Remove from oven and set aside.
  6. Reduce oven temp. to 200 degrees F.
  7. Whisk eggs, milk, sugar, cinnamon, nutmeg, and salt in a small bowl.
  8. Pour into shallow pan, like a 9 x 9 baking pan.
  9. With Kitchen scissors, trim the crust from each slice of bread and cut in half, from top to bottom.
  10. Flatten each piece with your hand and starting with the short end roll around sausage.
  11. Press to seal and set in the egg mixture to soak for 5 minutes.
  12. Melt 2 T of butter in a non-stick pan over medium heat. When butter foams add 7 of the wrapped sausages and cook, turning occasionally, for 4-5 minutes.
  13. When golden brown on each side remove to a paper towel lined baking sheet and keep warm in the oven.
  14. Add the rest of the butter and repeat with the remaining wrapped sausages.
  15. Dust with powdered sugar and serve with maple syrup.

Note: I had a lot of egg mixture left over. You could double the amount of sausages and bread slices and dip them in the remaining egg mixture, but you’ll need an additional 4 T butter for frying.

Check out Dave’s photography technique at French Toast Sausages: Behind the Scenes


Classic Cornbread & My Last Supper

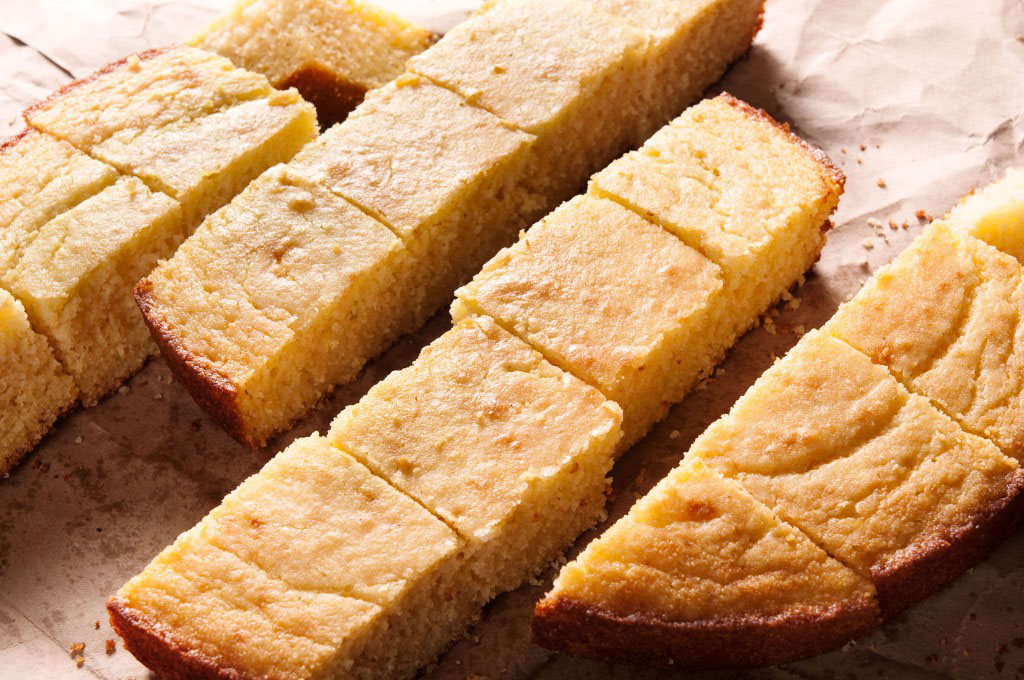
Classic Cornbread: a no-fail recipe for your Thanksgiving or Holiday table.

I don’t think about death.

I mean…yes, I know we are all going to leave this earth at some point, but I don’t dwell on the subject. Rather than considering the afterlife, heaven or never-ending abyss, I ponder the meal which comes beforehand. My last indulgence which satisfies me wholly, as if to say:

My palate is at peace. I am sated and ready for my next adventure.

Let’s see. Now…I’m not sure what will be piled on my plate. Perhaps, a big bowl of Killer Cajun Shrimp or maybe a huge piece of Beatty’s Chocolate Cake. But if I know one thing, it’s this:

There. Will. Be. Cornbread. There will most definitely be classic cornbread.

Classic Cornbread: a no-fail recipe for your Thanksgiving or Holiday table.

When I write ‘classic cornbread’ I mean nothing super-fancy. For me there’s no need to throw fire-roasted corn kernels or Gruyere with minced shallots into the batter. It doesn’t need the aide of honey maple butter or cranberry pepper jelly.  Ok…maybe the honey maple butter, but you get my point, right?

Classic Cornbread: a no-fail recipe for your Thanksgiving or Holiday table.

Honestly, I’d be delighted with just a chunk of cornbread, sweet butter and some strawberry preserves. After that, I’d be ready to walk into the light.

How about you? What will you have at your Last Supper?

Classic Cornbread Recipe

Classic Cornbread recipe slightly adapted from food.com

Classic Cornbread
 
Prep time
Cook time
Total time
 
Author:
Serves: 12
Ingredients
  • 1 c cornmeal
  • 1½ c buttermilk
  • 1¼ c flour
  • 1½ t baking powder
  • 1 t baking soda
  • 1 t salt
  • ½ c granulated sugar
  • 1 egg, large
  • ⅓ c butter, melted and cooled (1/2 c butter, browned on occasion)
Instructions
  1. Preheat oven to 400 degrees F.
  2. Coat 10 inch skillet with 1 tablespoon of oil or baking spray.
  3. Mix cornmeal and buttermilk in medium-sized bowl. Set aside. (The acid in the buttermilk softens the cornmeal while you prepare the rest of the recipe.)
  4. In a large bowl combine flour, baking powder, baking soda, salt and sugar.
  5. In a measuring cup or small bowl mix the cooled melted butter and egg.
  6. Combine butter-egg mixture with cornmeal-buttermilk mixture.
  7. Pour wet into flour mixture and combine until there are no more streaks of flour. Do not overmix.
  8. Pour batter into prepared skillet.
  9. Bake for 25-30 minutes.


Classic Cornbread Photo Shoot – Behind The Scenes

by David

This was a busy day.  It started with a family photo session and ended with insanely delicious cornbread.  Mondo may be known as the “cookie lady,” but when I hear the cast iron skillet hit the stove, Mondo’s true talents come to light.  This girl knows how to make classic cornbread.

Setting up the Shot

Most of the photography videos I watch online skip the metering and chimp their way to a good shot, but light meters are an essential tool in a commercial environment.  The thing most people don’t understand is that meters aren’t about setting the shooting exposure, but instead, establishing ratios on the set.

When I shoot a model on a white background, I use an incident meter to set the background at two-thirds of a stop over the shooting exposure.  This gives me a pure white background without blowing out the hair.  This level of accuracy is mandatory for catalog work and impossible without a meter.

For the classic cornbread shoot, I wanted something dramatic with deep shadows so I went with a 1:4 lighting ratio.  In other words, I setup the main light at f16 and the fill light at f8.  I ended up setting the shooting exposure at f11, but it could have been a little more or less depending on how I wanted to render the highlights and shadows.

Of course, all of this is made possible by metering.  Over the years, I’ve played around with various lighting ratios and typically know what I  want before I shoot it.

The lighting

For the main light, I used a light panel placed 45 degrees and approximately 5 feet behind the shooting table.  For fill, I decided to use a 60″ Softlighter directly behind the camera.  This was used to lower contrast and provided a very even on-axis fill.

I typically place the light panel closer to the food, but I wanted the light to have a little “snap.”  A lot of beginners assume that a light gets rougher when moved closer, but the opposite is true.

The character of light is determined by the size of the light relative to the subject.  If the light is moved closer, it gets bigger and softly wraps around the subject.  If it’s moved back, it gets smaller and creates hard crisp shadows.

Odds and Ends

Mirrors and fill cards are a big deal for food photographers.  On the shot below,  I wanted to have light scrape across the top of the food, but it was creating a very harsh shadow on the edge of the pan.  I couldn’t add another light without killing the texture, so I bounced a little light into the shadow with a silver fill card.  It was a perfect solution provided by a piece of scrap I found around the studio.

classic-cornbread-4

On this shot, everything looked great at first, but the surface of the knife and jam were lifeless.  Unlike the cornbread, these were reflective objects, not textural objects.  Reflective objects show dimension by mirroring the items around them.  Instead of scraping light across the surface, I created reflective specularity on the top of the jam with a 10 degree gridspot.  I then placed a white card over the knife so it would reflect the card of the black surface of the studio.

classic-cornbread-5

Wrap-up

By metering the set and understanding the nature of objects, I was able to do everything in-camera.  Instead of chimping away and hoping for the best with the lighting, I did the work during the shoot and left with very little to do later.  When I got home, I turned on the TV and watched Homeland instead of spending half my life in Photoshop.

All in all, a great shoot with a delicious meal at the end.

Technical

Camera: Nikon D90
Lens: Tamron 17-50mm 2.8
Strobes: White Lightning x1600
Tripod: Manfrotto
ISO: 200
Focal Length: 50mm
Shutter: 125

Aperture: f/11

Jumbo Pumpkin Donut Muffins & the Summer I Got Canned

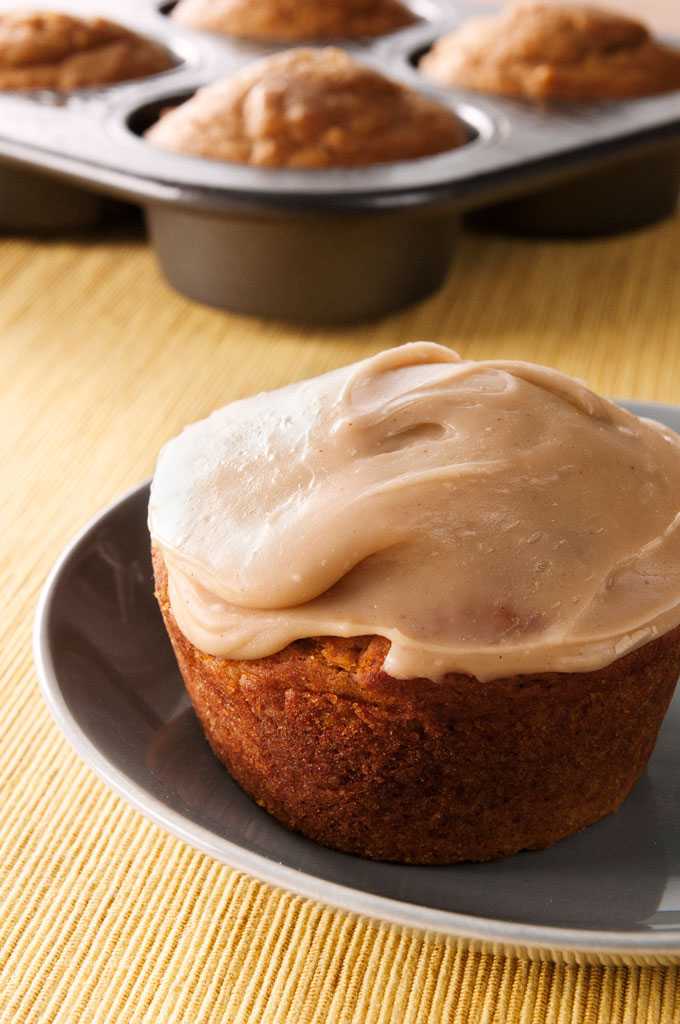
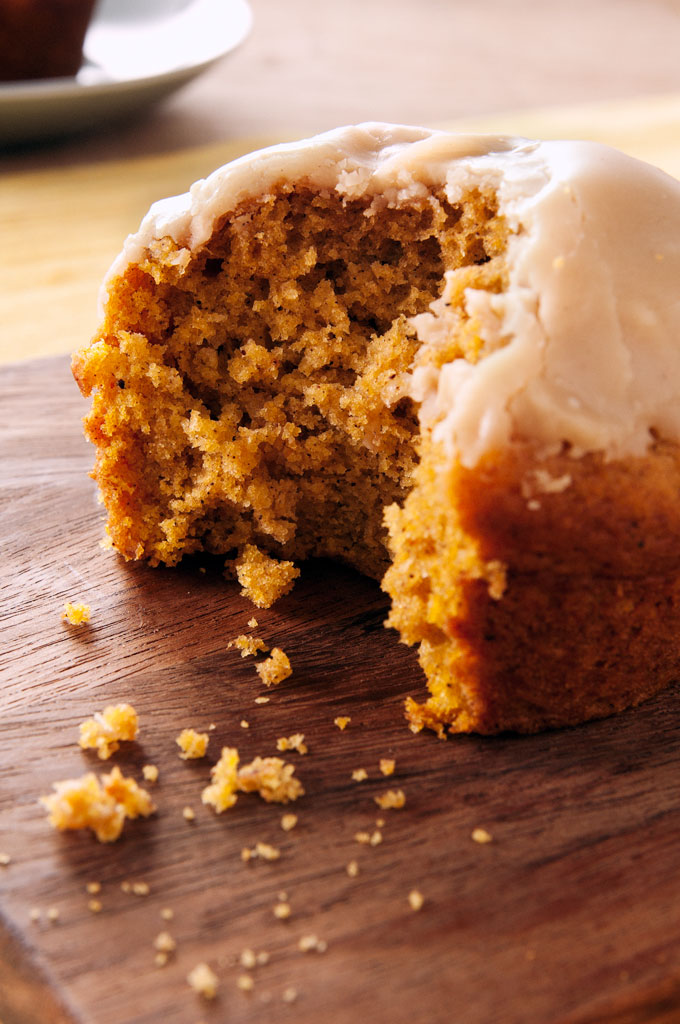
Jumbo Pumpkin Donut Muffins: a quick mufin recipe that will impress everyone at your breakfast table.

Once upon a time…

I got canned while on vacation. Yes, me. vacay. fired.

It was slightly embarrassing and perfectly understandable. You see, my boss was a troll.

Wait…that’s not fair. Perhaps, she was just a perfectionist? Nah, she was a troll.

At the time I was working at a bakery. I was super excited because finally, someone was paying me to do what I love. My neighbor, we’ll call her ‘Miss Good Intentions’ got me a job making pastries at a second bakery around the corner. I should’ve known it was a bad idea as she never had anything good to say about her boss; but I took the job anyway. I worked at the second bakery for three days. Here’s how it went.

Jumbo Pumpkin Donut Muffins: a quick mufin recipe that will impress everyone at your breakfast table.

Day 1

I met with the owner, a scary looking woman who looked like she desperately needed a bowl of soup and a nap. I kinda felt sorry for her. Little did I know she would soon can my ass so my sympathy was a bit misplaced. She showed me the recipes and how she wanted everything baked. No problem.

Day 2

After my 4 hr training session(Day 1), I was left to my own devices. I baked all the scones, muffins, cookies, etc. and plated them. It was ten minutes until opening and everything was ready, but wasn’t yet placed in the display case. Troll noticed and hit the roof. Queue the tongue-lashing I received with an audience. The cashier felt so bad for me she offered to make me a latte.

Day 3

With 20 ounces of Low Carb Monster in me I returned to the bakery energized and determined to please Troll. I kept to myself, focused on the tasks at hand and got everything baked and displayed under the wire. There was no praise from Troll she just hobbled over and gave me a new list of ‘things to prep’.

At the end of my shift she asked me to return the next weekend. I couldn’t as I planned to spend a week with my great friend Marsha, who was pregnant with her first child. I offered to come back the weekend after my return and Troll accepted.

Jumbo Pumpkin Donut Muffins: a quick mufin recipe that will impress everyone at your breakfast table.

The following week, whilst vacationing in Alabama, I got a call from the manager. She asked where I wanted my wages sent as my services were no longer needed.  There was no ‘wtf’ reaction from me; I wouldn’t give them the satisfaction. Politely, I answered her question and ended the conversation.

What upset me most is the fact that I never got to try their donut muffins. You see, the bakery was famous for them. Did I mention that Troll never let me try any of the baked goods? Good lord, Troll…have a heart!

Jumbo Pumpkin Donut Muffins and the Summer I Got Canned
 
Prep time
Cook time
Total time
 
Makes 6 Jumbo Muffins
Author:
Serves: 6
Ingredients
  • 1¾ c flour
  • ¾ c granulated sugar(originally ½ cup)
  • 2 t baking powder
  • ½ t baking soda (do not add if using milk)
  • ½ t salt
  • 1 t nutmeg
  • 1 t cinnamon
  • ⅓ c oil
  • 1 egg, large
  • ¾ c pumpkin puree
  • ½ c milk(I used buttermilk, hence the baking soda)
  • 1 t vanilla
Instructions
  1. Preheat oven to 350 degrees F.
  2. Spray jumbo muffin pan with baking spray or line with jumbo paper cups.
  3. Mix dry ingredients in a large bowl.
  4. Mix wet in a measuring cup or small bowl.
  5. Add the wet ingredients to the dry.
  6. Divide evenly among the six cups. I filled each cup with double scoops, size 16.
  7. Bake for 25 minutes.


Glaze

To make the glaze, melt 2 tablespoons of butter with 1 heaping tablespoon of heavy cream over low heat. Slowly whisk in 1/4 cup of brown sugar and remove from heat once fully melted. Vigorously whisk in 1/2 cup of confectioner’s sugar. Use immediately.

Jumbo Pumpkin Donut Muffins Photo Notes

by David

This was a good one.  After a lousy shoot last week that produced unusable pictures, I was relieved this session went well.

Frankly, when things go bad, it’s typically due to a lack of planning and bad technique.  It’s nearly impossible to “wing it” with studio food photography, yet I’m still dumb enough to do it on occasion.

This week, I planned, metered, and carefully coordinated the colors and composition before I picked up the camera.  When I finally took the first shot, I knew I had nailed it.

Lighting

The lighting was composed of three lights. The main light was a monolight bounced off a white wall at f11.5. The second light was bounced into a large piece of foamcore at f8.5 to give a little more wrap and the third was a soft silver umbrella set at f4.5 to provide fill from the opposite side.

I liked the natural look of this setup, but there were problems with specularity off the top of the muffins.  A little specularity is normal and necessary, but the top of the muffins were completely blown out.  I adjusted the camera and lighting angles but I finally used my hand as a Gobo over the top of the muffins.  It was a stupid simple solution, but sometimes it’s just easier sticking your hand on to the set and blocking the light.

Wrap Up

This was a fun shoot and I saved a $1000 on lighting modifiers by bouncing a light off the wall and a piece of cardboard.  It’s easy to get caught up with all the latest gear, but when it comes down to it, once light bounces off something or travels through a piece of nylon, it’s all going to look the same.  The only thing that truly matters is the size of the light relative to the subject.  Of course, if Chimera calls tomorrow with a sponsorship, I’ll sell out faster than M.C. Hammer jumping off a Taco Bell.

Setup

pumpkin-muffin-4


Technical

Camera: Nikon D90
Lens: Tamron 17-50mm 2.8
Strobes: White Lightning x1600
Tripod: Manfrotto
ISO: 200
Focal Length: 50mm
Shutter: 125
Aperture: f/11

Beer Bread & Why We Have So Many Bottle Caps

BeerBread2-website

We drink beer around here.

Beer Bottle Caps

Can you tell?

Got an “A”: drink a beer.
Lost my wallet: need a beer.
Chips is on: grab a beer.
Tuesday morning: breakfast beer.

Are you feeling me? We really don’t need a reason in this house. Beer time=anytime.

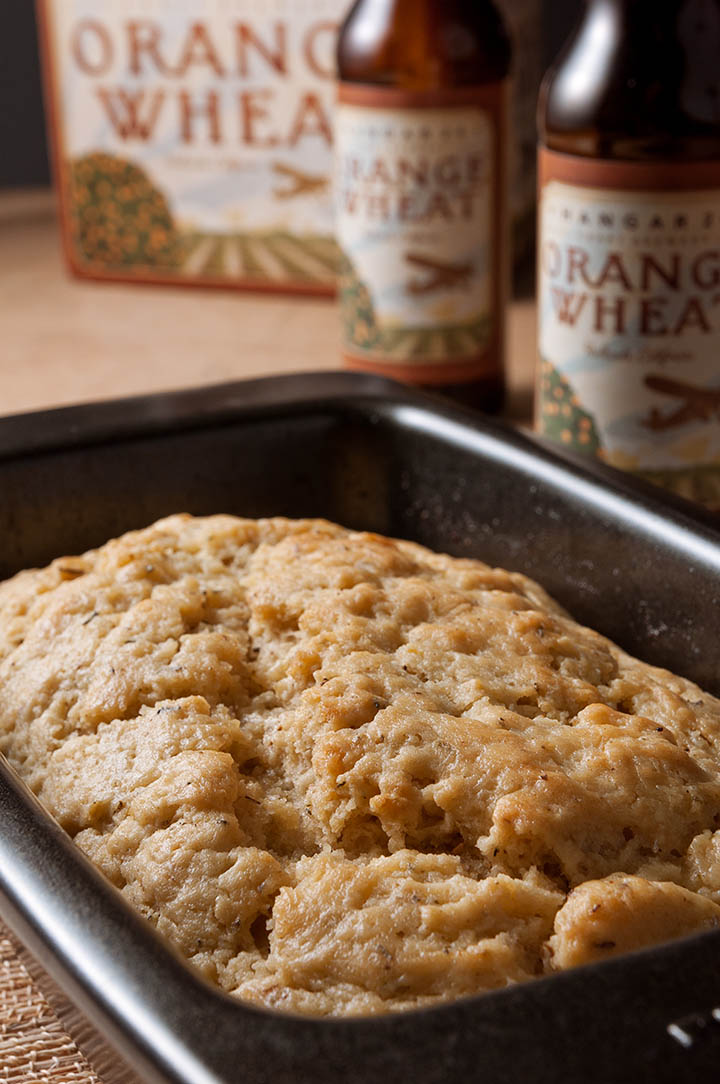
There’s nothing like the first pull of an ice cold beer-for real. Yesterday, after waking early and having a very productive morning I realized I lost my wallet. Yeah, that really happened. Why? C’mon, you know why. I’m a hot mess. After searching in the hot-ass sun for an hour there was really only one thing left to do…cry on the floor in a fetal position get some beer. The dman came to my rescue and picked up a sixer of Hangar 24 Orange Wheat Ale. I love this beer. Golden. Tangy. Refreshing.

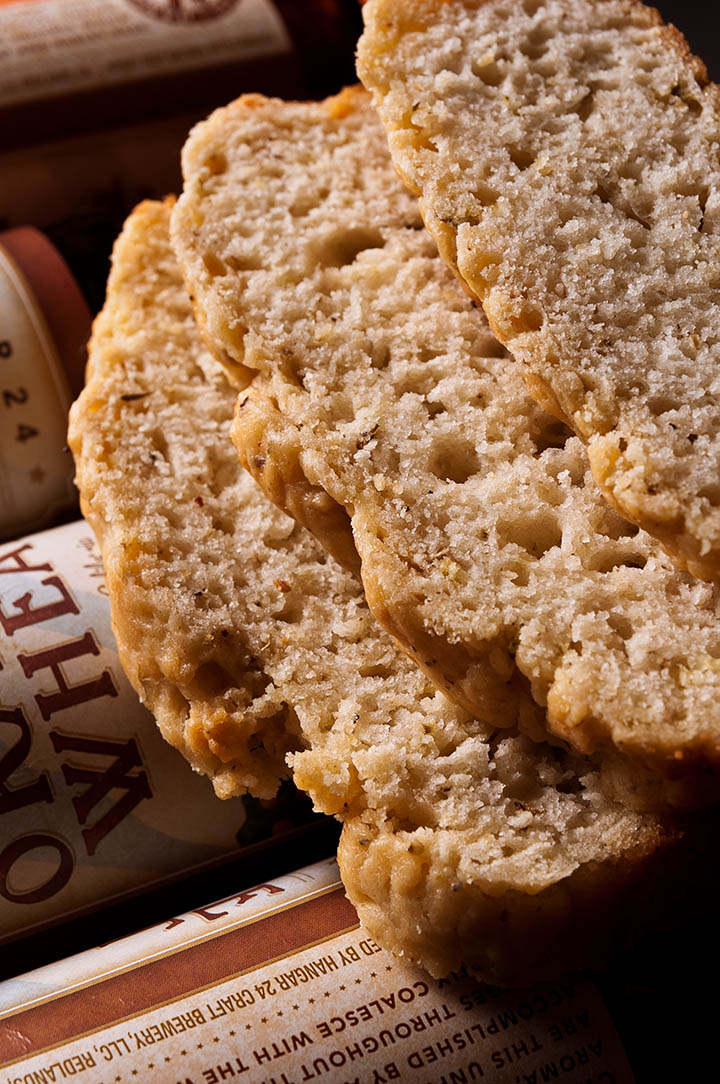
Hangar 24 Bread

The following morn I had one beer left. What should I do…drink or bake?

I decided to bake beer bread then immediately regretted my decision. That was my last beer! What was I thinking?  An hour later with a fresh cold one in hand, a calm came over me and I had changed my attitude. This bread takes less than five minutes to put together and then the oven takes care of the rest. That’s my kind of recipe as sometimes I can be slazy* in the kitchen.

I’d say this beer bread was a wee bit on the sweet side. Dried thyme and oregano were added to the batter but the herbs got lost in the mix. I’m thinking…next go ’round I’ll throw in a handful of raisins and 1 tsp of cinnamon for a sweet treat. Or perhaps, I’ll cut the sugar by 1 Tsp and add some fresh herbs with grated cheese. Either way, I have a bread recipe that requires no yeast, kneading or proofing and that makes me smile.

Beer Bread on Bottles

Now, if you’ll excuse me…Chips is on in five.

*slazy (adj.): simultaneously smart and lazy. Originated by Karen of The Art of Doing Stuff.

Beer Bread Photo Notes

by David

Gameplan

I wanted this one to be warm and low key. Most food photography is super bright, but beer bread is a comfort food that called for something a little different.

Lighting

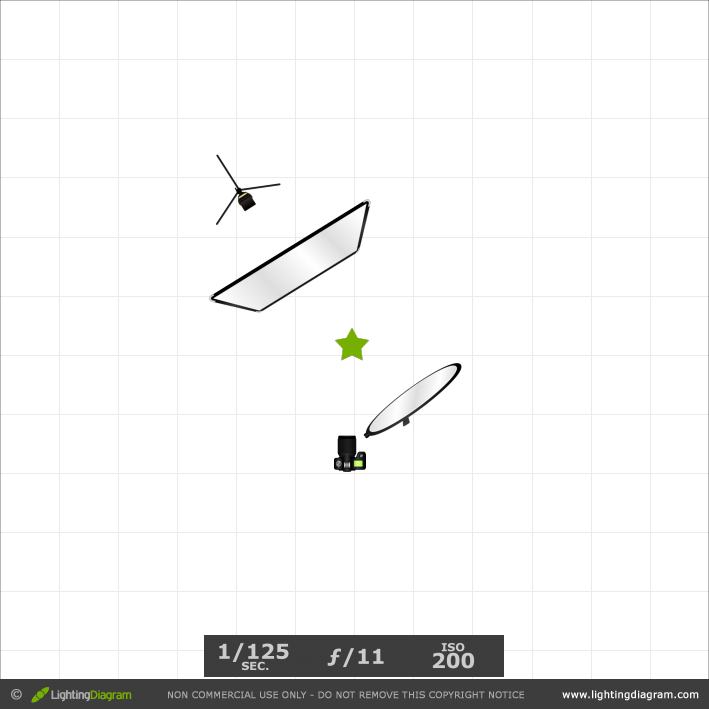
To achieve this look, I used a simple light panel and a white bounce card. The panel is made of 400 Leelux that has a warm tint. Most of the time I correct for this tint with a custom white balance, but I shot everything on “Daylight” and left the images warm.

When lighting anything, you have to consider the nature of the object. Bread screams “texture,” so I placed the panel 45 degrees behind the subject and let light scrape across the surface. This gave the bread dimension and created contrast. To fill in the shadows, I placed a white board opposite the light.

The fill was minimal and left deep shadows to accentuate the texture.

beer bread lighting diagram

Bonus Round

After styling the bread to perfection, Mondo put the bottle caps together for the last shot. For this one, I wanted crisp, long shadows to give the bottle caps dimension. I hit them with a 20 degree gridded spot light from behind that created directional light with limited wrap. This gave the image a lot of punch and I filled in the dark side of the caps with a white fill card …. simple and effective.

beer bread lighting diagram 2

Wrap-up

This was a smooth session and we actually finished early. After the shoot, we went out and celebrated with our good friend Nadia Elahi who just got a full-time professorship at Los Angeles City College. Congratulations Nadia, tenure is just around the corner.

Tech Notes

Camera: Nikon D90
Lens: Tamron 17-90mm 2.8
Strobes: White Lightning x1600
Tripod: Manfrotto
ISO: 200
Shutter: 125
Aperture:  f/11

Beer Bread Recipe

Recipe slightly adapted from Ezra Pound Cake

Beer Bread
 
Prep time
Cook time
Total time
 
Makes 1 loaf
Author:
Serves: 4-6
Ingredients
  • 3 cups all-purpose flour
  • 3 tablespoons sugar
  • 1 tablespoon baking powder
  • 1 teaspoon salt
  • 1 bottle (12 ounces) beer
  • ½ cup (1 stick) unsalted butter, melted (Note: Feel free to reduce to ¼ cup.)
Instructions
  1. Preheat the oven to 350 degrees F. Grease a 9-x-5-x-3-inch loaf pan.
  2. In a medium bowl, whisk together the flour, sugar, baking powder, salt and any herbs and/or cheese, if using.
  3. Using a wooden spoon, stir the beer into the dry ingredients until just mixed.
  4. Pour half the melted butter into the loaf pan. Then spoon the batter into the pan, and pour the rest of the butter on top of the batter. Slide a baking sheet onto a lower rack to catch any butter that might overflow from the loaf pan (there is no need for this when you use ¼ cup of butter).
  5. Bake for 50 to 60 minutes, until golden brown. Brush loaf with melted butter. Serve immediately (or wait until later. I had mine for breakfast the next morning).


Easy Apple Cake & My Not-So-New Tart Pan

Easy Apple Cake

Tarts are cool. Much cooler than cake or pie, for that matter. Tarts are just so laid back-like they have no worries. Unlike me; I worry about everything.

Ages ago I bought a tart pan…and when I write ages I mean sometime in 2011. Whilst pondering the very cool and laid back things I wanted to bake in said pan, I came across this recipe from Heidi at 101 Cookbooks. It is simple and unfussy, which is definition of laid back. Is it not?

Easy Apple Cake

This recipe is great if you want to make something quick and impressive for dessert or a lazy Sunday morning. I used whatever apples I had on hand which is invariably, Fuji. Fuji is my favorite apple, unless Honey Crisp is in season. Then I’m like…Fuji who?

This batter makes quite a bit of dough, too much for my 9 x 1.5 pan. I suggest halving the recipe or baking it in two pans. Otherwise, your finished product will be quite dense and won’t cook all the way through.

My favorite part of the cake was the crust-all shiny and golden. Would you consider me weird for slicing the crust off the top and leaving the rest behind? Yes? Then I guess I’m weird…and I’m ok with that.

P.S. Apple Cake accessories may include: floral jammies, french press and a king-sized comforter.

Check out the d-man’s lighting technique below.

Apple Cake Photo Notes

This shoot was a bit of a bust.  It started off fine, but plumbers + food photography = disaster.  Let me explain.

I work out of a really cool photo studio in a beautiful apartment complex built in the 1920’s.  I love the space, but last year, the adjoining art studio was taken over by a plumbing company.  Unfortunately, we share a common bathroom and I’ve learned photographers and plumbers don’t mix.  I have a “live and let live” attitude, but these guys can be a headache.

The latest drama came in the middle of the apple cake shoot.  A plumber knocked on my door and said  “We need to run a cable through your studio for the new security cameras we’re putting up in the hallway.” This wasn’t good.  I told them to call the landlord and went about my business.  After a few minutes, the owner came over and told me he really needed to run a cable through my studio and I told him he really needed to call the landlord.  That never happened and they bypassed my studio and did the job anyway.  I don’t know why a plumbing company needs “Mission Impossible” style security in a common hallway, but I now have the most secure shared bathroom America.  I also have a blown apple cake photo shoot, but those are the breaks.

Here is a lighting diagram for the abbreviated shoot.  The setup is the same as the cinnamon rolls recipe.

Dave

Apple Cake Lighting Diagram

Tech Notes:

Lighting: White Lightning X1600 monolight bounced through Calumet light panel
Camera: Nikon D90
Lens: Tamron 17-50mm 2.8
Tripod: Manfrotto with trigger grip
Aperture: f/11
Shutter: 1/160
Focal Length: 50mm