After a much needed break, I’ve returned with a Southern favorite: Coca Cola Bundt Cake. Okay, I know what your thinking… Coca Cola Bundt Cake is not really a thing, but I’m making it a thing for this month’s #Bundtbakers. The theme, as you may have guessed, is retro desserts. When pondering old-school desserts the…
You and your chocoholic loved one will devour this Dark Chocolate Heart Cake on Valentine’s Day. I can’t believe Valentine’s Day is almost here. It feels like I was just baking a Nutella Glazed S’more Bundt Cake and complaining about how it felt like Fall would never come. Ironically, here it is the middle of…
I am feelin’ this mocha biscuit cake, y’all. And I gotta tell ya: I have a soft spot for desserts that come together easily…and this dessert falls into that category.
What’s up, people? Are you ready for another round of the fabulousness that is Bundtbakers? I mean, I can’t hear you through my laptop so I’m assuming you all responded with a resounding “Yes!” This month’s theme is Strange but good flavor combinations. I found some weird ones out there, particularly this avocado pound cake…
Sometimes you need that extra somethin’ in your baking. Usually, I reach for Bourbon (god bless you, Kentucky), but lately I’ve been reaching for Amaretto. You may remember this lovely almond-infused liqueur from this california almond fudge pie or this incredible amaretto almond bunt cake.
Moreover, I was supposed to meet Leonardo Dicaprio and his supermodel girlfriend for dinner at KFC, but for some strange reason I stood them up. Incredibly weird. The upside is I got to meet Dizzy Gillespie and we had a nice chat. Freaking Dizzy Gillespie, man! Yeah, I forgot all about Leo after that. Of course, it was all a crazy dream. Leo doesn’t eat Kentucky Fried Chicken, people! And The Great Dizzy is long gone, but our tête-à-tête was beautiful.
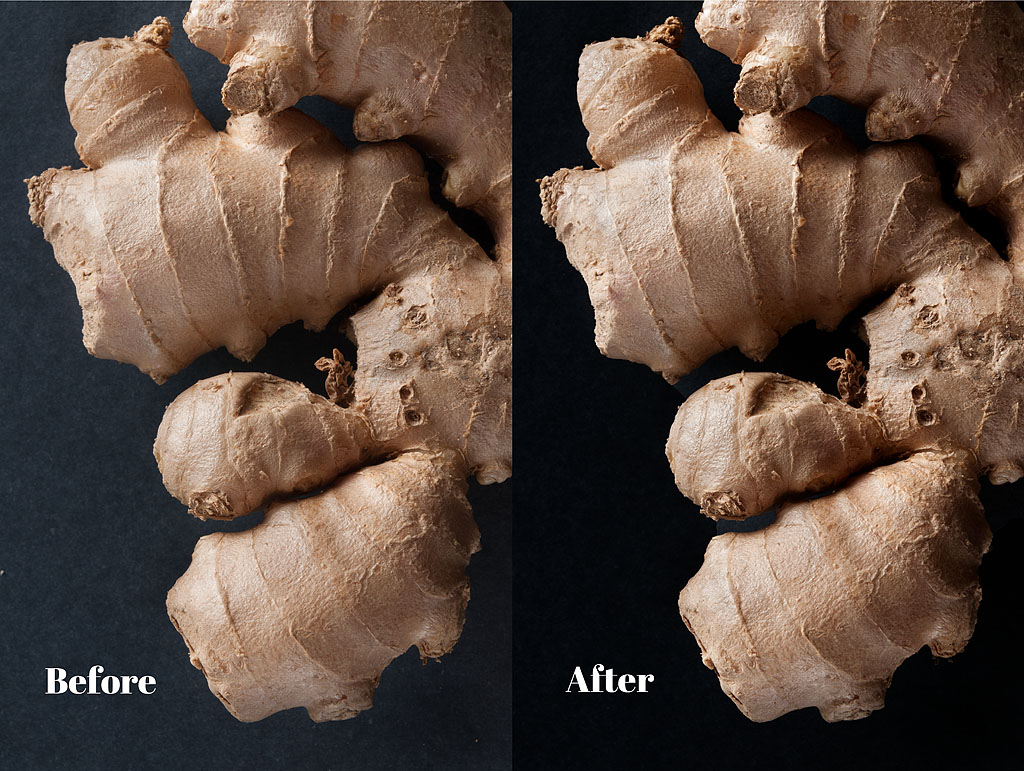
As a photo lab tech at the local community college, I see a lot of film images every week. Many of them start off rough, but I’m always amazed by how much they can be improved in the darkroom. With a little contrast and some dodging and burning, the difference is usually night and day.
In the age of digital, most images go straight to the web, but a lot of them could use the same TLC. Film may be dead, but the old techniques of dodging and burning still work.
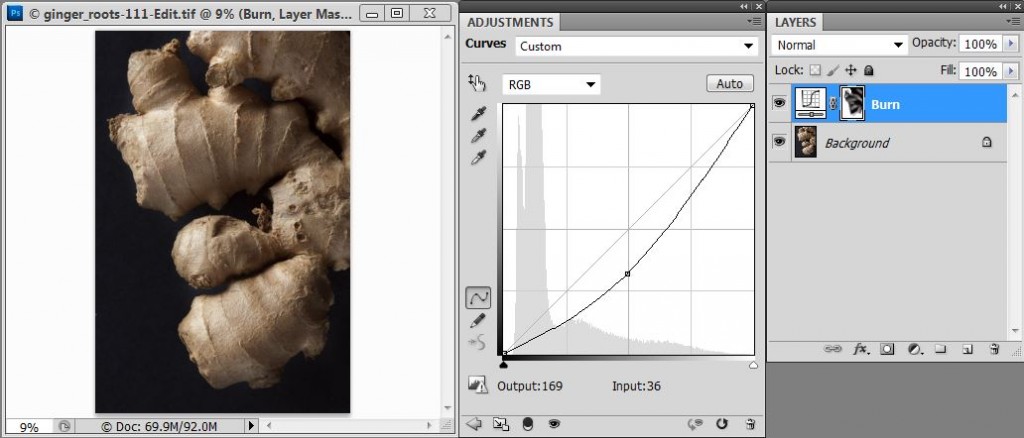
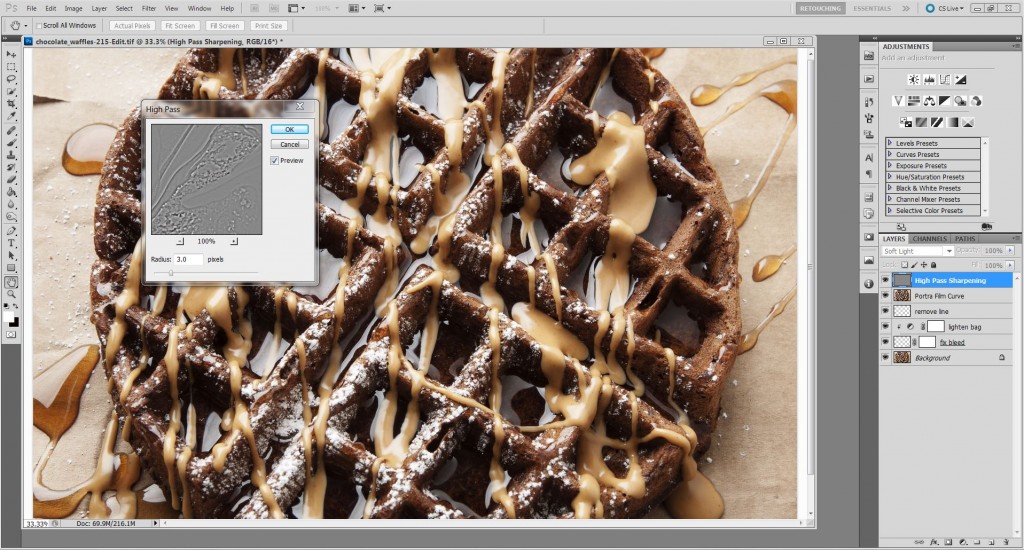
In Photoshop, this arduous analog process is made easy. There are many techniques, but I prefer to dodge and burn with curves because the process is easily modified after the fact.
How to Dodge and Burn with Curves
Step One
Create a curves adjustment layer
Menu ->Layers -> New Adjustment Layer -> Curves
Name the layer “Burn”
Lower exposure by pulling down center of curve
Step Two
Select curves layer mask and invert it (it should be black)
Crtl I – Win
Cmd I – Mac
Step Three
Select a brush and set to o% hardness and 7% opacity
Brush color should be white
Select the Curves layer mask and set layer blendmode to luminosity
Slowly brush areas that need to be darkened
Step Four
Create a curves adjustment layer
Menu ->Layers -> New Adjustment Layer -> Curves
Name the layer “Dodge”
Increase exposure by lifting center of curve
Step Five
Select curves layer mask and invert it (it should be black)
Crtl I – Win
Cmd I – Mac
Step Six
Select a brush and set to o% hardness and 7% opacity
Brush color should be white
Select the Curves layer mask and set layer blendmode to luminosity
Slowly brush areas that need to be lightened
Final Steps
If the work is complete and you need to make changes, just paint back the mask or adjust the curve. It’s that simple. If you want to do more, just add another curves layer and make some more adjustments. By working on a curve layer, flexibility is built in and changes be made down the road.
I’m proud to announce that my recipe for Grilled Cheese Egg in the Hole is featured on Kitchen Daily today! Why? Because everybody knows that you’re meant to eat Grilled Cheese Egg in the Hole on Hump Day…and Fridays…and Sunday mornings, for that matter.
So, go now. Make yourself a sandwich. Fill it with melted cheese and fried eggs. Grab your favorite coffee mug and get all up in Kitchen Daily. Oh, and don’t forget the bacon. Everything is better with bacon. I’m just sayin’.
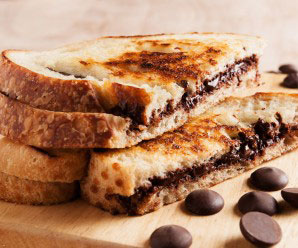
Why wasn’t it me who came up with melted chocolate on buttered, toasted bread? I crane my neck and scream at the chocolate gods:
Why? Why wasn’t it me?
As usual, they ignored me, but I’ll be alright. My girl, Alice Medrich, hooked me up.
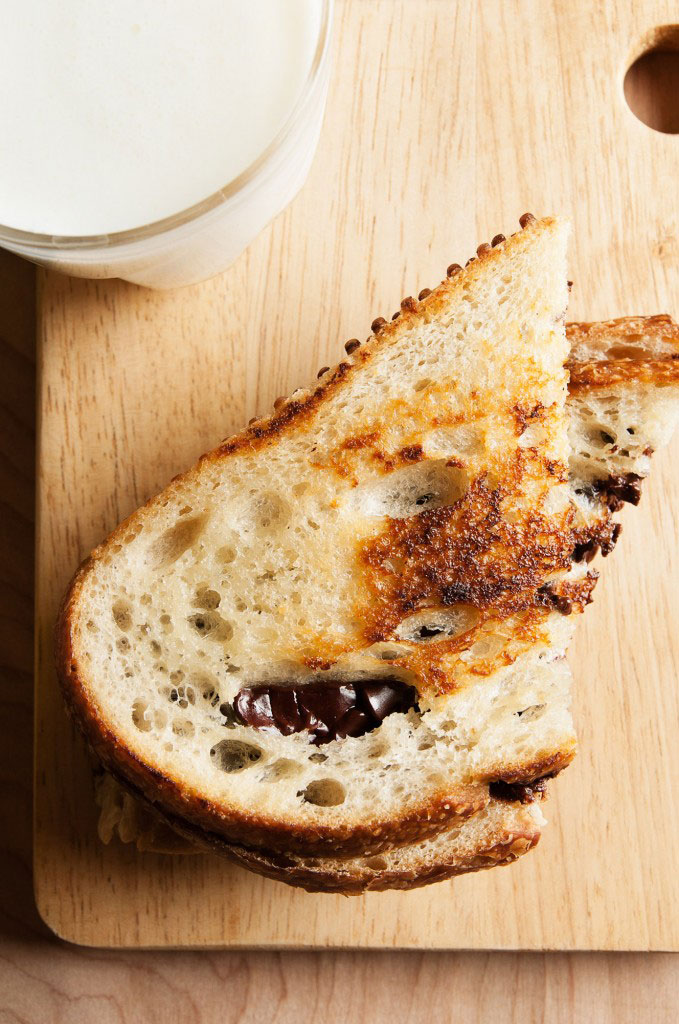
Usually, when it’s snack time, I reach for a big ole box of Cheez-its. Sometimes, if Sriracha is on hand, which is always, I’ll make my favorite stove top popcorn. But this sandwich? Oh man, grilled chocolate sandwiches are my new favorite snack. I love that you can see the chocolate peeking through the sourdough. Hello!
I’m not gonna lie to you. I put extra chocolate in my sandwich. Hey, it’s not my fault, man! San Luis Sourdough has really long slices, alright? Plus, I needed the antioxidants or whatever.
Pay attention, now because this is simple: chocolate + buttered bread + grill = your next culinary adventure. Do it…then tip your hat to Alice Medrich…and of course, the gods of chocolate.
Grilled Chocolate Sandwiches Recipe
Grilled Chocolate Sandwiches Recipe barely adapted from Food52
High Pass sharpening is the absolute best way to sharpen photos. If you plan to print or display your images on the web, sharpening is an essential process to make your pictures look their best. Read More…